Dinda - How to Make GIF Images
Thursday, June 28, 2012
Hi guys ^^ We're back, sorry for the lack of updates. So today I'm going to make a tutorial on how to make gifs with PhotoShop, I use CS3 but I think it works on any version. Note: This is MY version on how to make a gif, there are many more ways but I think you'll get a much better quality if you make it this way. Okay, so here's what you'll need:
Step 1: Converting to JPG
Okay, first off open your video to JPG converter. Click add files and select the video that you want to gif, select every frame and then convert.
Right, after converting, this is just to make sure. Go to your pictures library and there will be a file named "FreeVideoToJPGConverter" and open the file inside it, and it will look something like this: (depending on the video that you converted of course)
Step 2: Making the GIF
Now, you need to open your PhotoShop. Click File >> Scripts >> Load Files Into Stack, and browse.
Okay so now open your file and select the scenes that you want to gif and then OK. Wait for it to load and you'll get something like this (again, depending on the video).
If an animation window doesn't show on your PhotoShop, just select Window >> Animation.
Click on the little arrow at the right corner of the animation window, and select Make Frames from Layers. After that select Reverse Frames because it is still animated backwards.
Step 2.5: Resizing, Setting the Time and Adding a PSD
You can skip this step, but if you want a higher quality gif than you should continue reading. Now, resizing a gif is important to me because if you don't it will be too big and it'll load slowly. Just simply select Image >> Image Size and set the width to no more than 500px.
Next is setting the time, like how long it is to animate from one frame to another. Click on the little arrow on the top right at the animation window and click Select all Frames. And then right click on one of the frames and select one of them, I like to use 0.1 seconds so it's not too slow or too fast.
And now add a PSD, you need to follow
this tutorial and make sure that the PSD group is on the
very top of the layers window. Like this:
Step 3: Saving the GIF
Select File >> Save for Web & Devices. And a window will appear, you can simply follow how I set all of it, but of course you can customize it any way you like.
Note: If you don't want the gif to be too big, set the dither to 70% or lower, and the color to 130 or lower. The thing is, just don't forget to set the image type to GIF.
Save and you're done. Here's the result:
Do NOT steal anything! I worked hard on this tutorial! Kbye and this is already midnight hee hee bye now.
Labels: dinda, tutorial
Lettha - Icons 100 x 100
Wednesday, June 27, 2012
Lettha -
Twitter -
Blog -
Flavor
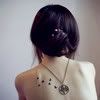









Hiks, sorry just 14 icons today :( and credit properly if you use these icons.
Credits to:
here.
Labels: icon, lettha


